 |
Things have progressed
a lot since the last post. Friday the 4th of April saw me test the audio
system and it works a treat. A bit of resonance off the cabinet distorts
at high volume but all in all it sounds fine, especially considering how
bad the audio conditions are. The top of an arcade cabinet (at least a
design like this one) is not exactly a great speaker enclosure.
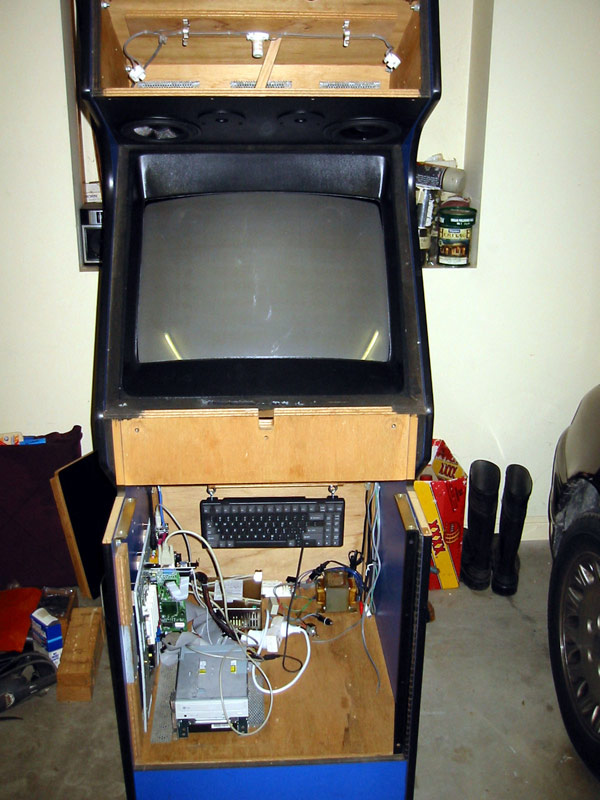
On the left here you can see the speakers in the top and the fluoro
lighting stuff that is screwed in above them. I haven't put the bulb
itself in yet as I've put some silicon on the capacitors on the tweeters
to make sure they don't bounce about. There's some wood clamping them down
while it dries which you can see in the middle at the top. The bulb would
just get in the way while I'm working.
The monitor is back in place, which means there's less junk in the living
room, if nothing else! I've built the video cables and run all the power
and what-have-you to get it all going. You can see all the computer parts
are in, including the suspended keyboard. I ended up buying some hooks and
eyelets and after drilling a couple of tiny holes in the keyboard case I
screwed the hooks in and squirted some glue on the threads to make sure
they didn't move around. Looks and works a treat.
At the moment there are a few
parts lying loose on the floor of the cabinet but I'll eventually fix them
in place (i.e. the fuse and monitor power switch.) I've postponed powering up the monitor until I come back from catching a
movie - if it blows up I don't want to have it ruin the film. :) |
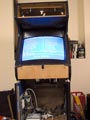 |
Okay, as you can see the power-up went fine. Here is the
computer BIOS screen being displayed on the arcade monitor. There is a
little colour distortion in the top right and bottom left but it isn't too
bad. I'll see how it affects MAME games once I get it going.
The computer power supply passes power through to the step-down transformer
that gives the monitor the 110V that it needs so everything fires up with
the touch of a button. At present I've plugged in a reset switch to act as
a power switch but I've altered the BIOS to allow the keyboard to power up
the computer. This means I only have to hit a control panel button and the
whole system fires up. I'll probably change this to a particular keypress
otherwise the cat will most likely turn it on all the time :) But for
testing purposes it works a treat.
Right now I'm transferring the MAME ROMs via the network. This is
agonising as my long UTP cable is only rated for 10Mbits and it's taking
all night. Still, at least it's working. |
Windows seems to run okay in 640x480 interlaced. Some of the fonts are a
little indistinct but it's certainly quite usable. There is some nasty
colour bleeding here and there but a change of Windows colours might
remove that, or even a check that the video cables aren't getting
interference from somewhere. I had to plug a mouse in to install some
software but once the control panel is built I will be able to use the
trackballs instead.
So, now I need to get into serious design mode and get the control panel
built. I've done some more work and decreased the width to something a bit
more manageable but it'll still be a little while before I'm happy with
it. |
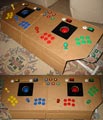 |
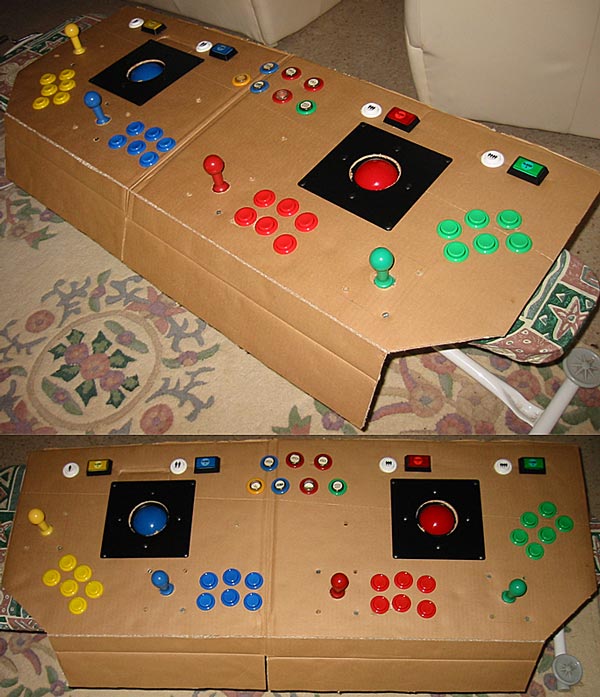
Here you can see I've
mounted my control panel parts onto a cardboard mock-up. The top is 1075mm
by 400mm (43" by 16") which makes it 20% wider and 30% deeper
than the original control panel. That sounds way bigger but you are
getting an arse-load more controls on there. A test run of the trackballs
proves that they feel fine to use in their current location. I was a
little concerned that the joysticks might get in the way of effective
"trackballing", but this isn't the case. I didn't
bother installing my spinner as the install is a pain and the knob is only
very small anyway (where have I heard that before?) Pretending to use it
seems to feel fine. You can see where 2 of them will be installed between
the 2 trackballs.
Looking at the original panel I've noticed that there is a slight angle on
the upper surface. That is, it leans towards the player by about 6 degrees
or so. This will make the woodworking a little trickier but no difference
to the steel upper surface. I figure it's worth reproducing, as a totally
flat surface would be uncomfortable. |
| All I need now is my housemate to come back so he can help me get a feel
for the controls. That is, the spacing between them when more than 1
person is standing in front of it. The initial design turned out to be a
little cramped between the 2 central players so I moved them apart a
little and they feel much better now. If this turns out to be fine then
I'm very close to final fabrication. My only concern now is how the steel
fixes to the wooden box to make the entire control panel. Everything is
obvious except for the angled front which will take some engineering to
get to mate up neatly with the timber. If the front lip of the panel were
vertical then it would be simple but I'm trying to use a 120 degree inward
angle. This makes for a very complex corner piece that I worked out in a
3D rendering program and a lot of Boolean subtractions. If it ends up
looking like crap I can always mount a piece of something over the entire
front and hide it. |